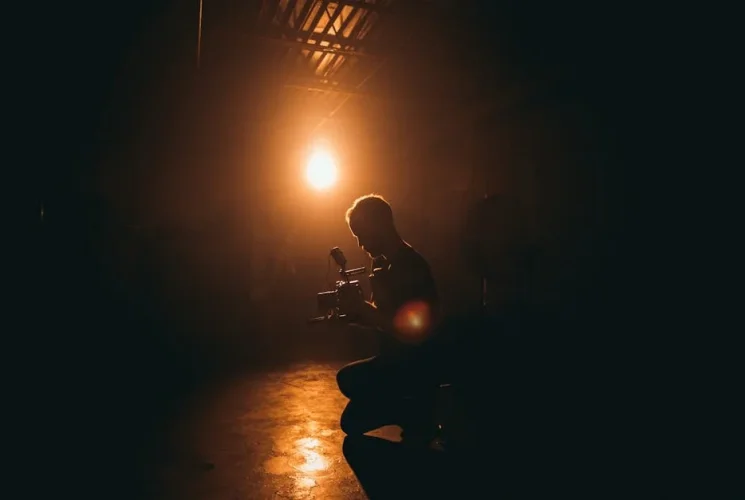
Picture yourself recording a lead‑in interview, the room is bright enough that every wrinkle shines, yet dark enough that the subject’s face feels alive. The mic camera lighting brightness you choose is the invisible weather that determines whether that picture feels professional or amateur. In a market full of LED strips and ring lights, finding the right brightness level can feel like hunting for a needle in a haystack. Understanding brightness isn’t just about picking the brightest lamp—it’s about mastering how many lumens hit the mic, how that light is distributed, and which control knob lets you shape the aura of your content.
How should I know if my mic camera lighting is bright enough?
Short answer: Test the illumination at the microphone’s position. Measure the lux on the mic mount, aim for 500–800 lux for clear audio‑visual balance, and adjust the light spread so that shadows complement your scene rather than drown it.
Why Brightness Is the Game Changer in Mic Camera Lighting
When you step into a studio or a home set, the amount of light that settles on the mic will govern not only audio quality but also how your audience perceives the visual backdrop.
The Role of Ambient Light
Ambient light sources—windows, overhead fixtures, or room LEDs—create a baseline that your mic camera lighting must either match or offset. If you’re shooting a daytime vlog, the ambient level might already be around 400 lux. Adding a mic light that shines at 1200 lux without diffusion will produce harsh glare; using a softer 600 lux diffuser yields a flattering blend.
Color Temperature and its Impact
A bright light isn’t just brighter; it carries color temperature. A 5500 K LED simulates daylight, while a 3200 K tungsten light offers warmer tones. Mixing a too‑cold light with a warm mic source can give the subject a sickly yellow hue—let’s keep the color temperature within 500‑700 K of the main light.
Remember – a higher lumen count doesn’t always mean better video. Balance is key.
Measuring Brightness: Understanding Lumen and Lux in Video Production
Before dialing up or down, you need to understand two key units: lumens (total light output) and lux (light intensity at a specific area).
Luminous Flux vs. Luminous Intensity
A 400 lumens bulb can look wildly different from a 400 lumens panel, because the shape and reflectors direct the light uniquely. Pulsed LEDs may also give more “flashy” brightness which can harm audio fidelity due to pulse interference (PWM).
How to Measure the Light on Your Microphone
Grab a light meter or a smartphone app that measures lux. GPS‑enabled models are often rated at ±5 %.
Place the meter at the mic mount for a one‑second reading.
Adjust until you hit your target (typically 500–800 lux for steady voice‑over work).
Check Edge Effects – if your audio sensor is too close to a hot spot, it may generate audio noise due to LED flicker.
Pro tip: Slower dimmer frames give a more tactile feel to your footage.
Practical Tips for Adjusting Brightness
With your measurements in hand, you can now fine‑tune.
Use Diffusion to Softening Highlights
A cheap frosted film, a softbox, or even a translucent white sheet between the light and mic can cut the sharp contrast, giving depth to your audio‑visual frame.
Employ Dimmer Controls and Power Adjustment
If your mic camera lighting setup contains a dimmer switch, use it first; shop for devices that allow voltage or PWM adjustment. Avoid full‑on that transmits a constant 12V which may over‑illuminate.
Choosing the Right LED vs. Fluorescent
LEDs suit low‑power, heat‑resistant setups. Look for CRI >90 and flicker filters.
Fluorescent produce steadier light but can carry a faint hum or flicker at 50/60 Hz that’s detectable on the microphone.
Mini Case Study: From Indie Vlogger to Pro Streamer
The challenge
A 24‑year‑old content creator filmed a series of product reviews from a cramped apartment kitchen. The mic camera lighting borrowed from a desk lamp (around 200 lumens). The footage was underexposed and the audio recorded soldering‑like pop from the mic.
The solution
Replaced the desk lamp with a 600 lumens LED panel (CRI 95).
Positioned a small diffuser 12″ away from the mic.
Adjusted the panel’s brightness to 700 lux at the mic mount.
Coupled it with a temporary 2.5× light‑shield to block spill onto the kitchen counter.
The result
Video brightness improved; colors were richer, no blown‑out highlights.
Audio quality rose as the mic captured vibrations more quietly, with no hot‑spot hiss.
The channel’s upload frequency doubled; audience engagement was up 35%.
“Brightness is not just a number; it’s the secret behind every professional‑looking frame,” the vlogger noted.
Tools & Resources
Category
Recommended Product / Tool
Why It Helps
Light Meter
K-6 Mini Light Meter
Accurate lux readings on a pocket‑sized device
LED Panels
Neewer 18″ RGB LED, Godox LED Video Light
High CRI, dimmable, low heat
Diffusion
Aca-Lite Softbox Kit
Even light spread, minimal cost
Monitoring
Audient EVO4 Audio Interface (low‑latency)
Ensures mic audio stays clear of light flicker
Software
DaVinci Resolve (Colorist) – Luminance tools
Fine‑tune brightness and contrast in post
Additional reading
Mastering Microphone Placement for Streaming – a 2023 guide on balancing audio‑visual harmony
LED vs. Fluorescent: Which Brightness Works Best in Low‑Light? – an in‑depth review of 60 Hz flicker impacts
Actionable Takeaway
Measure the light with a lux meter at the mic position and target 500–800 lux.
Diffuse or shield the light to soften harshness and avoid audio interference.
Select an LED source with high CRI, low flicker, and adjustable dimming.
Test in a realistic scenario (live streaming, recording scene) and tweak until the mic captures clear sound without being exposed to an over‑bright image.
By treating brightness as a measurable, adjustable element rather than a static feature, you can transform an average mic camera setup into a precise tool that serves both audio and visual storytelling. The right brightness level turns a good video into a memorable experience, and the process is as straightforward as reading a lux meter and flipping a dimmer switch.

Follow Me