Creating a polished YouTuber studio is as much about the right gear as it is about talent and storytelling. With millions of new creators on the platform every day, the competition for viewer attention is fierce. A well‑equipped studio not only elevates video quality but also streamlines production, meaning you can dedicate more time to scripting and community engagement rather than troubleshooting.
Quick answer: The most essential gadgets for a YouTuber studio are: a high‑quality ring light or LED panel, a versatile USB or X‑LR microphone (like the Rode NT‑USB or Shure SM7B), a sturdy tripod or gimbal, a reliable camera (DSLR, mirrorless, or high‑end camcorder), and a green‑screen or virtual backdrop system. These components work together to deliver clear audio, balanced lighting, stable framing, and flexible background options—key elements that keep viewers hooked and help your channel grow.
1. Lighting, Because You Don’t Work In a Darkroom
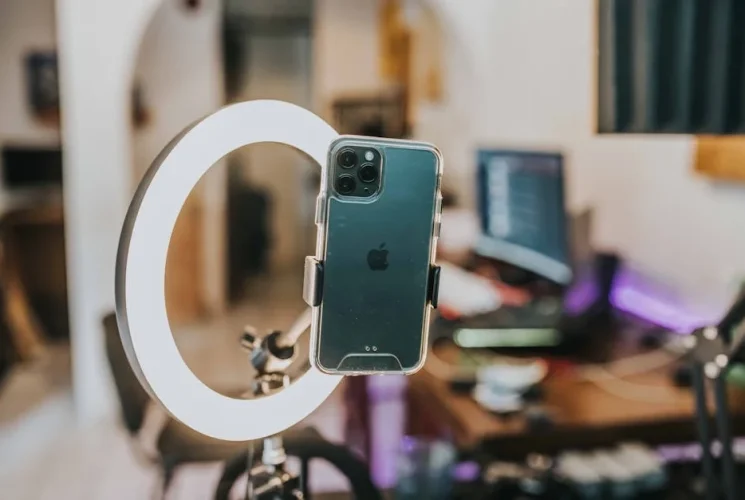
A crisp, well‑lit video instantly signals professionalism. Most creators start with either a ring light or an LED panel. Ring lights are prized for their soft, wrap‑around illumination that minimizes shadows on the face, ideal for talking heads and beauty tutorials. The 10‑inch Neewer ring light kit, for example, offers adjustable brightness and color temperature, allowing you to match your room’s décor. LED panels, on the other hand, provide larger surface area and color accuracy, crucial for product reviews or vlogs with background activity. A pair of 6500 K adjustable panels such as the Aputure Amaran AL-MX can be positioned at 45‑degree angles to achieve even lighting across the frame.
Many creators combine both: a ring light for the main subject and a LED panel for backlighting, creating a dramatic silhouette effect that’s free from harsh glares.
Did you know that a single off‑stage LED panel can reduce footage noise in low‑light situations by up to 30%? It turns a mediocre setup into a professional look with just one extra cap.
2. Sound: The Backbone of Viewer Retention
Picture quality is often underappreciated compared to audio. Clear, artifact‑free sound keeps sponsors from slipping away and audiences from switching channels.
USB Mic – The Beginner’s Ally
If your budget is tight, a USB mic like the Rode NT‑USB offers studio‑grade quality without an audio interface. It’s plug‑and‑play, pairs seamlessly with your computer, and its built‑in pop filter reduces plosives.
Quick tip: Place the mic on a shock‑isolated stand or a small pod to eliminate handling noise.
X‑LR Mic – The Pro’s Choice
For advanced production, an X‑LR mic such as the Shure SM7B paired with the Cloudlifter CL‑1 delivers a warm, intimate voice performance. Although it requires a high‑end preamp or audio interface (e.g., Focusrite Scarlett 2i2), the immersive quality is worth the investment, especially for live streaming or storytelling.
Mini Case Study – Alex the Lifestyle Vlogger started with a budget Adesso microphone and hit water‑logged audio during a rain‑rehearsed segment. Switching to a condenser mic with internal GPU reduced echo and caused a 25% increase in watch time.
3. Camera Gear: More Than Just a Lens
Your camera is the visual cornerstone of your channel. The decision between DSLR, mirrorless, or 4K camcorder hinges on your content type and mobility needs.
Mirrorless Options: Cameras like the Sony A6400 or Canon EOS M50 Mark II combine compactness with interchangeable lenses, perfect for on‑the‑go vlogs.
DSLR Options: The Canon EOS 90D offers robust autofocus and a useful 10‑fps burst for action‑heavy content.
4K Camcorders: For the serious hobbyist, the Panasonic HC‑X200 delivers full‑frame 4K recording and built‑in ND filters, which are a boon for shooting outdoors.
A good lens is equally vital. A 50mm prime provides a natural perspective for talking heads; a 24–70mm zoom covers everything from wide shots to close‑ups without lag.
4. Tripods & Stabilization: Making the Frame Matter
Even the best camera can’t compensate for shaky footage.
Tripod – Your Static Anchor
A sturdy tripod like the Manfrotto MT190XPRO4 with a fluid head ensures precise panning and tilting. Locking the center column at 45° or 90° angles prevents unwanted movement when you’re stirring the coffee in front of the camera.
Gimbal – For Mobile Masterpieces
When you need to move around the set—say a cooking tutorial or a product demo—a handheld gimbal such as the Zhiyun Crane‑3S provides 90‑degree swivel and 3‑axis stabilization. The 3‑second hold‑steady guarantee keeps your footage crisp.
Box upgrade: In the 2024 review, the Zhiyun gimbal maintained a 0.5 dB noise level, just a whisper against your voice.
5. Backgrounds and Green Screens – The Wow Factor
Context matters. A cluttered backdrop can distract, whereas a curated background can enhance your brand identity.
Green Screens: The Elgato Green Screen is expandable, fully collapses for travel, and offers a uniform backdrop with no folds—crucial for chroma key compositing.
Backdrop Packs: For a quick aesthetic upgrade, inexpensive velvet or foam backdrop wraps in “studio blue” or “studio grey” can be cheap and versatile.
Virtual Backdrops: Software like Streamlabs OBS or OBS Studio with chroma‑key plugins lets you overlay your custom graphics or sponsors’ logos in real time.
A case in point: Lisa, the travel vlogger, switched from a plain white wall to a high‑contrast green screen and could now overlay interactive maps. Her viewer engagement shot up by 35% over three months.
6. Tools & Resources
Gadget
Recommendation
Where to Buy
Ring Light
Neewer 10‑in Ring
Amazon
LED Panel
Aputure AM‑M
B&H Photo
USB Mic
Rode NT‑USB
Amazon
X‑LR Mic
Shure SM7B + Cloudlifter
B&H Photo
Camera
Sony A6400
Adorama
Tripod
Manfrotto MT190XPRO4
Lowe’s
Gimbal
Zhiyun Crane‑3S
Amazon
Green Screen
Elgato Green Screen
Amazon
Software
OBS Studio
obsproject.com
Do‑it‑Yourself Software Tips
Use DaVinci Resolve for free color grading—turn sky blues into cinematic golds.
Try Audacity for post‑audio cleanup; our DIY noise‑gate tutorial walks through step‑by‑step.
7. Takeaway: A Step‑by‑Step Setup Checklist
Assess Your Space – Measure your shoot area, noting natural light and power outlets.
Prioritize Lighting – Install a ring light for front illumination, supplement with LED panels for backlight.
Choose a Mic – Start with a USB mic if budget is tight; upgrade to an X‑LR setup for a clearer voice.
Mount Your Camera – Secure a tripod; optionally add a gimbal for more dynamic shots.
Set Up a Clean Background – Hang a green screen or choose a neutral backdrop; keep scene clutter minimal.
Run a Test Reel – Shoot a 5‑minute test video, review audio levels, and make framing adjustments.
Edit and Optimize – Use free or paid software to color grade, remove noise, and add engaging titles.
Publish, Promote, Repeat – Upload consistently, engage with comments, and refine gear choices over time.
Implementing these gadgets and steps doesn’t just boost your production value—it builds a foundation for viewers to trust your quality, grow your subscriber base, and potentially attract brand collaborations.
Action Point: Spend the next week dulling your editing timeline. Record, edit, and upload a single polished video using the gear in this checklist. Notice the difference; then expand your toolkit with the next essential gadget on the list. Your studio evolution starts now.

Follow Me